This is the new Settings UI currently in Beta. It provides the same configuration options with a redesigned interface accessible from the Workspaces UI.
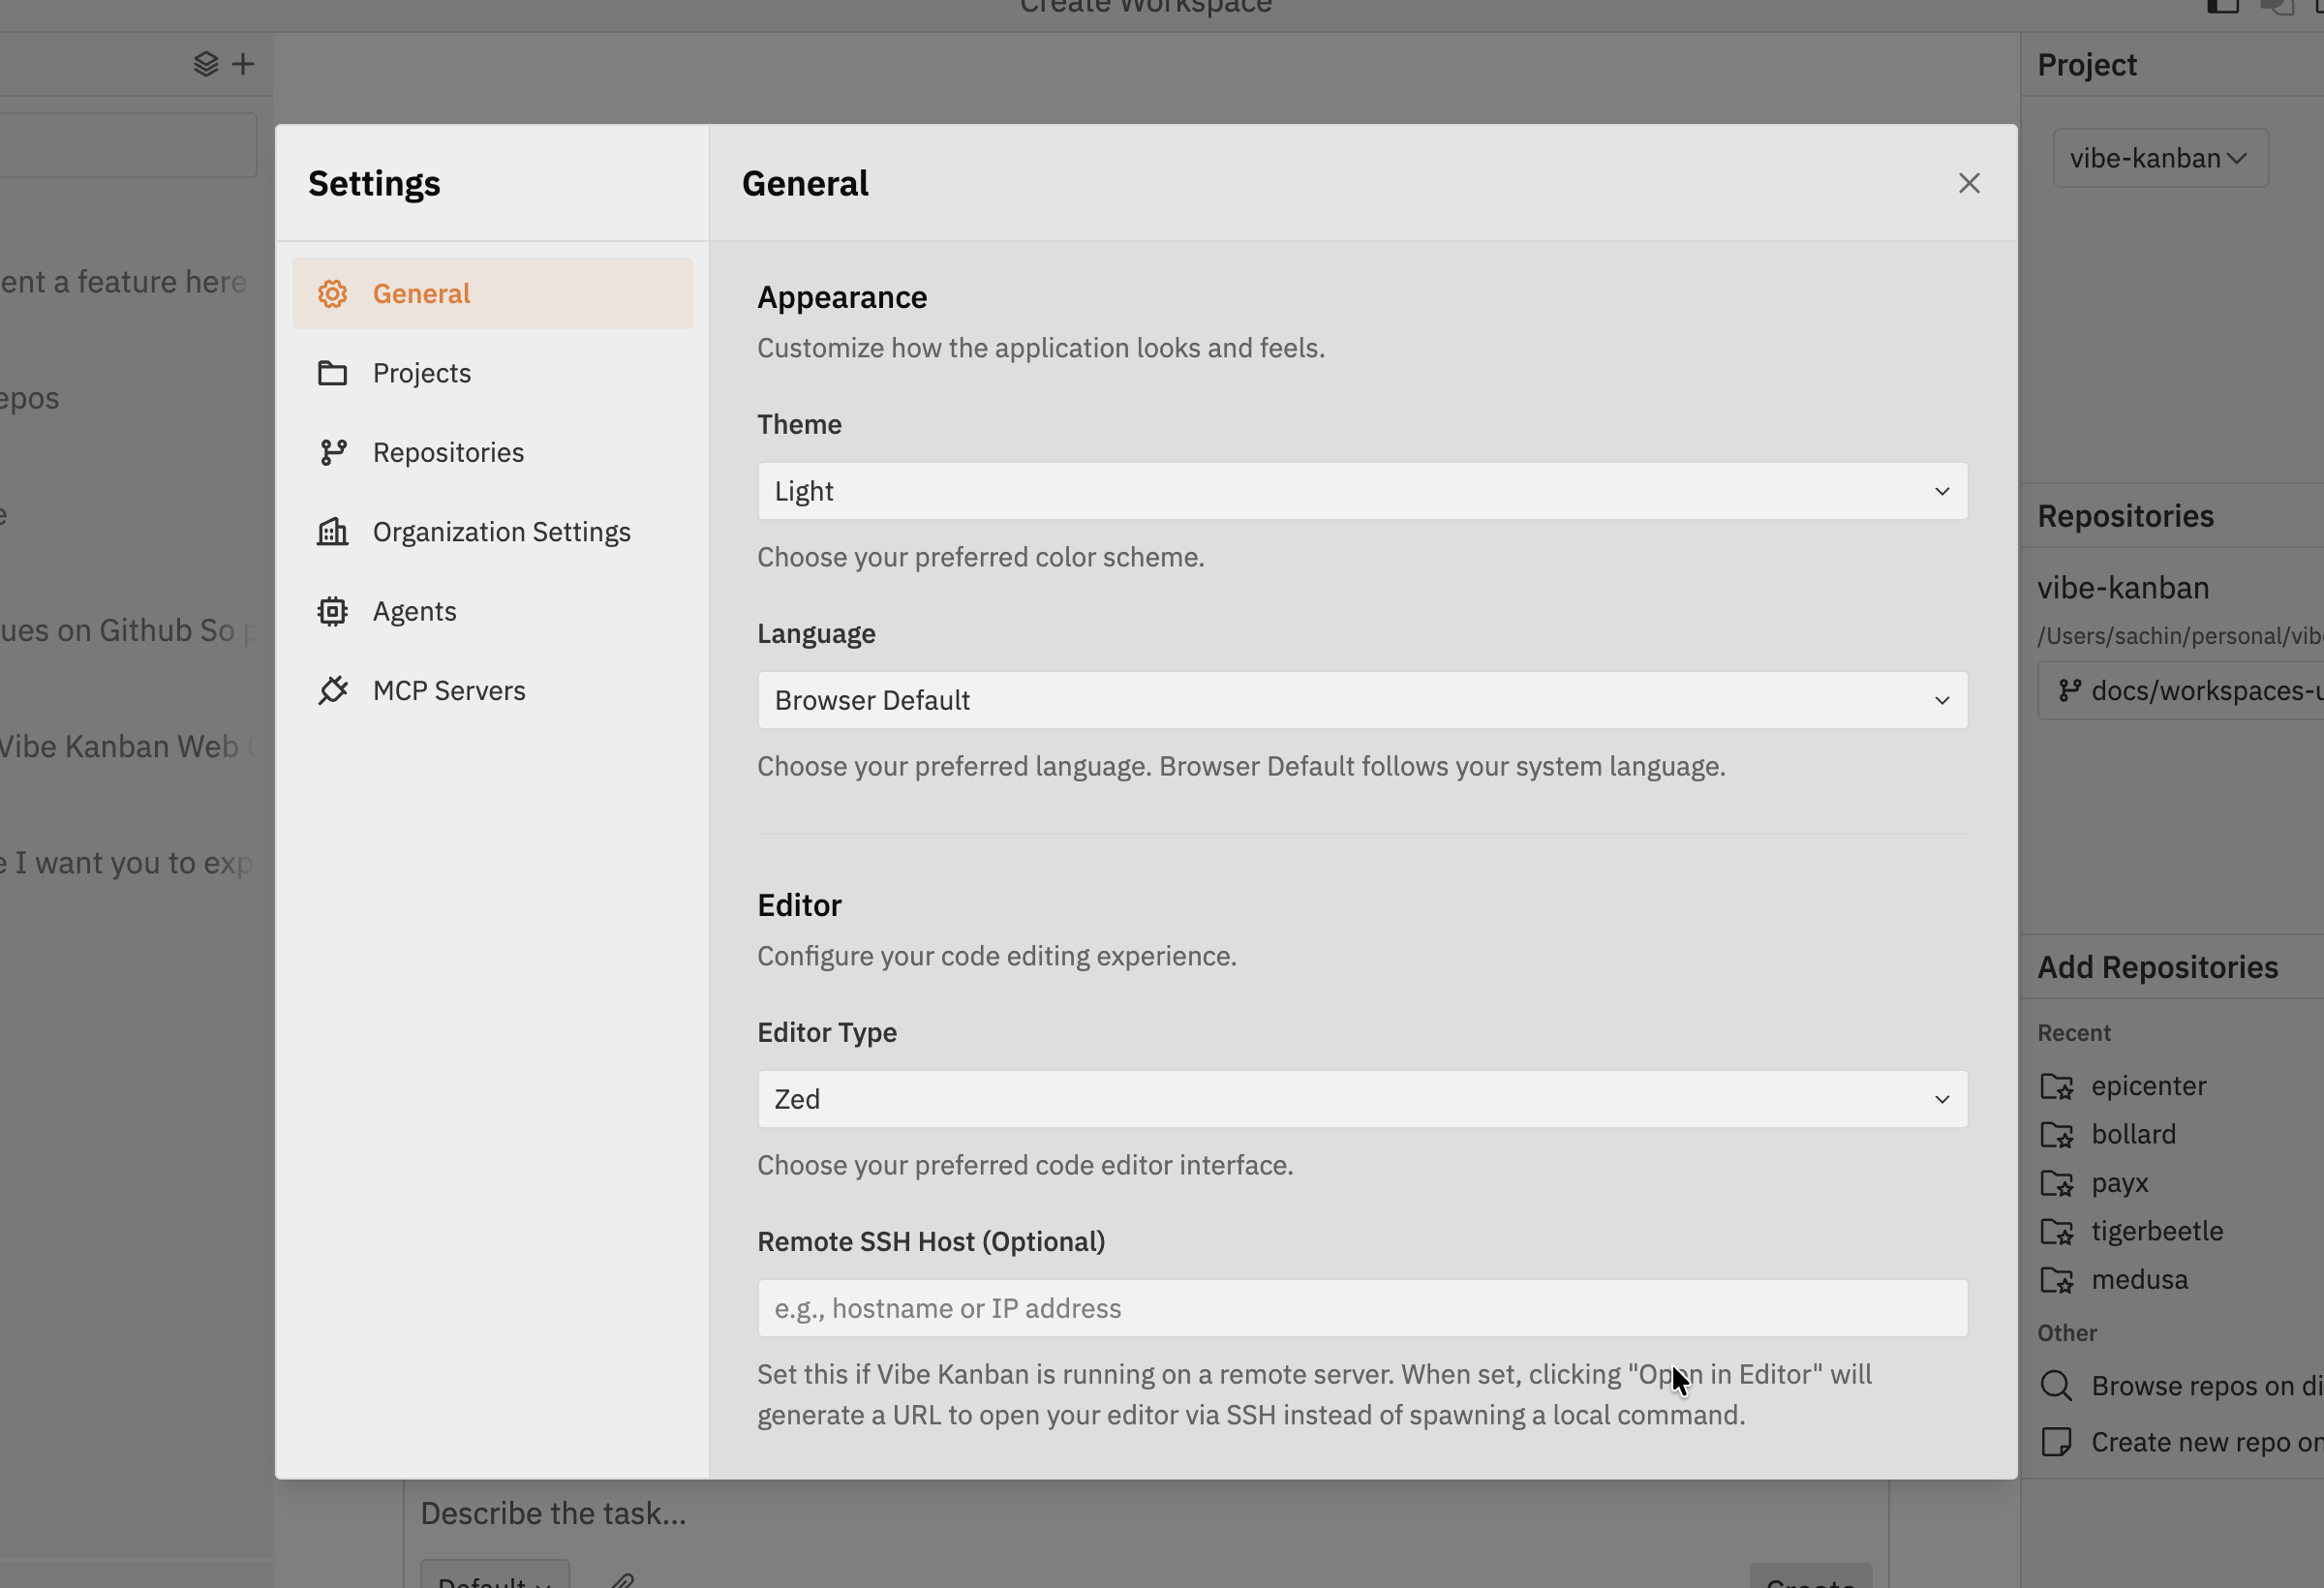
Appearance
Customise how the application looks and feels:- Theme - Choose between Light and Dark colour schemes
- Language - Select your preferred language (Browser Default follows your system language)
Default Coding Agent
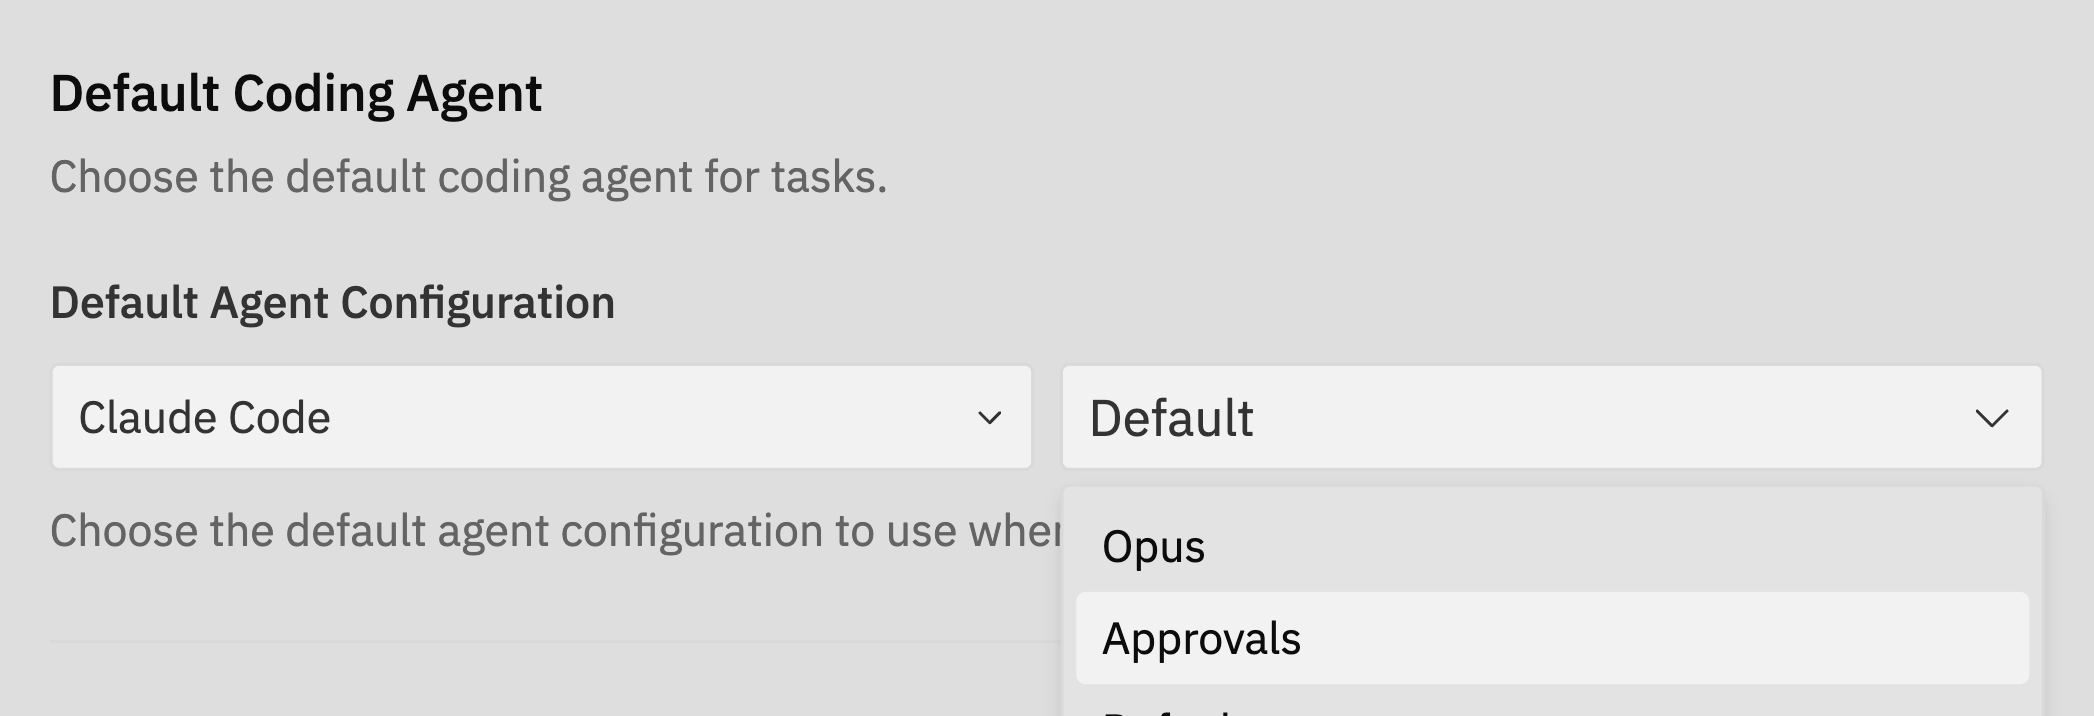
- Agent - Select your preferred coding agent (e.g., Claude Code, Gemini CLI, Codex). This determines which AI assistant handles your coding tasks.
- Variant - Choose a configuration variant for the selected agent (e.g., Default, Opus, Approvals). Variants contain different settings like planning mode, model selection, or permission levels.
Editor
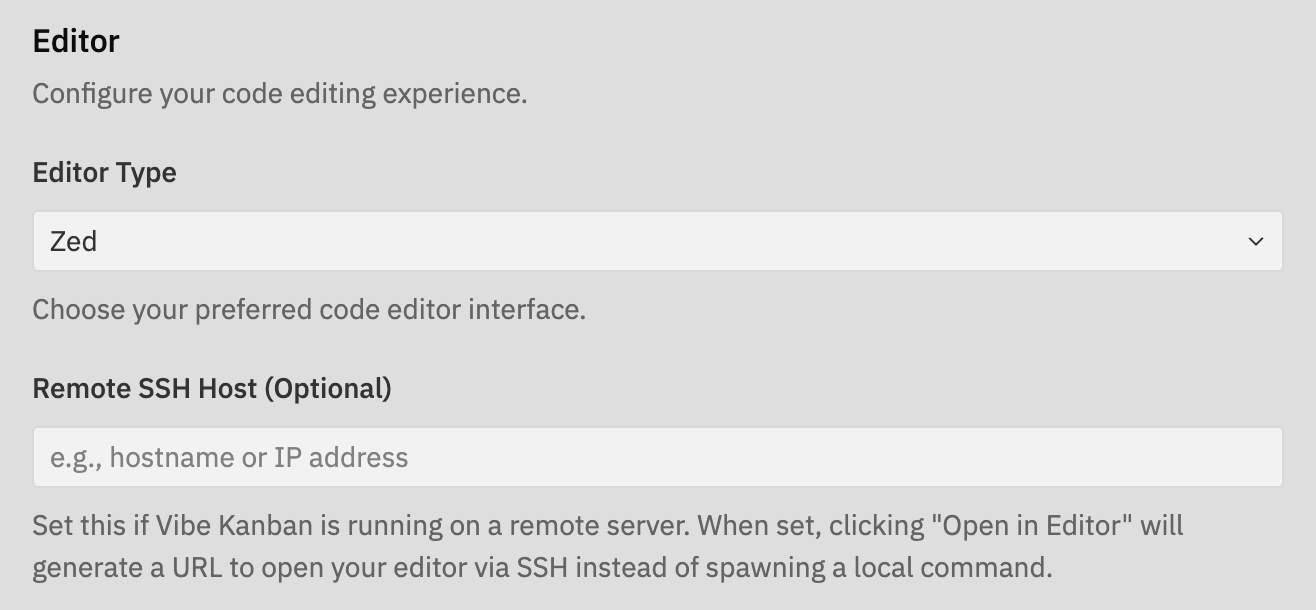
Selecting Your Editor
Choose from various supported editors:- VS Code - Microsoft’s popular code editor
- Cursor - VSCode fork with AI-native features
- Windsurf - VSCode fork optimised for collaborative development
- Zed - High-performance code editor
- Antigravity - Google’s AI-native code editor
- Neovim, Emacs, Sublime Text - Other popular editors
- Custom - Use a custom shell command
Custom Editor Example
When selecting Custom, you can specify any shell command to open files. The command receives the file or directory path as an argument.Opening Your Editor
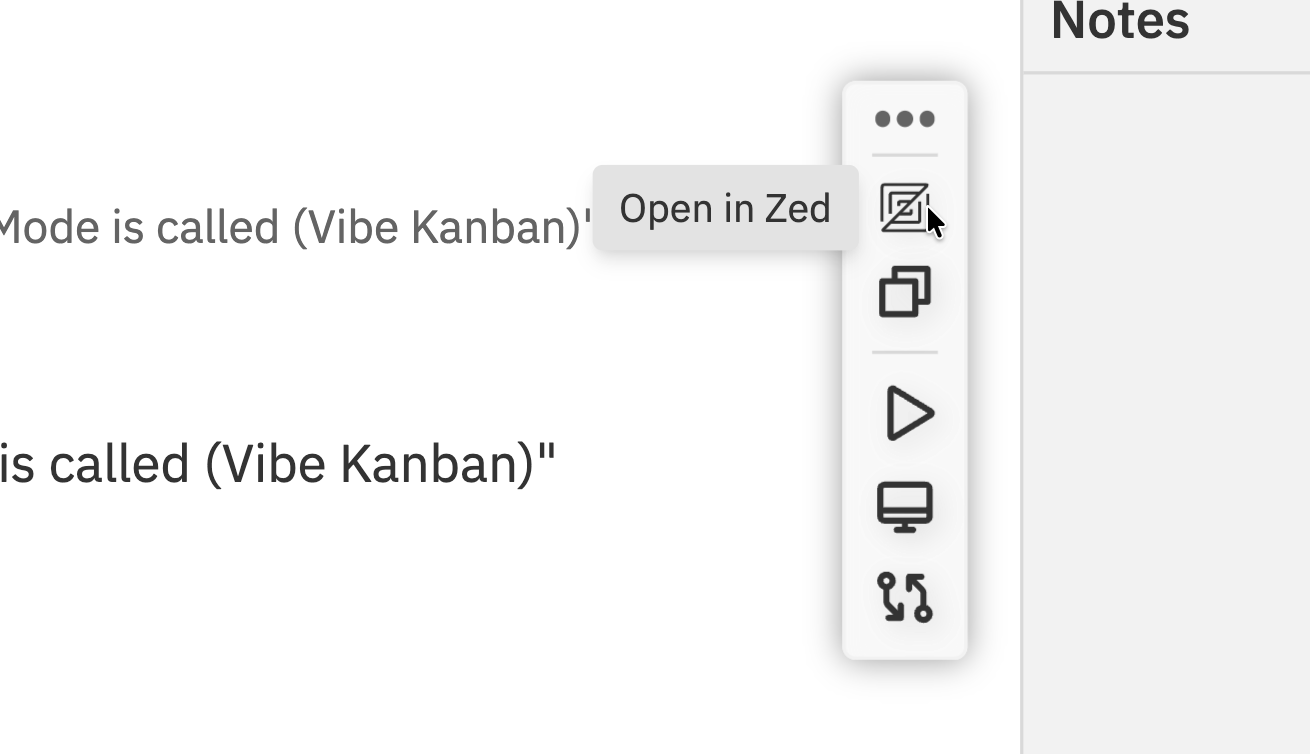
- Context bar - Click your IDE logo icon in the floating context bar to open the workspace
- Command bar - Press
Cmd/Ctrl + Kand select “Open in IDE”
Remote SSH Configuration
When running Vibe Kanban on a remote server (e.g., accessed via Cloudflare tunnel, ngrok, or as a systemctl service), you can configure VSCode-based editors to open projects via SSH instead of assuming localhost. This feature is available for VS Code, Cursor, and Windsurf editors.When to Use Remote SSH
Enable remote SSH configuration when:- Vibe Kanban runs on a remote server (VPS, cloud instance, etc.)
- You access the web UI through a tunnel or reverse proxy
- Your code files are on a different machine than your browser
- You want your local editor to connect to the remote server via SSH
Configuration Fields
- Remote SSH Host (Optional) - The hostname or IP address of your remote server (e.g.,
example.com,192.168.1.100,my-server). Must be accessible via SSH from your local machine.
How It Works
When remote SSH is configured, clicking “Open in Editor” (or Cursor/Windsurf):- Generates a special protocol URL like:
vscode://vscode-remote/ssh-remote+user@host/path/to/project - Opens in your default browser, which launches your local editor
- Your editor connects to the remote server via SSH
- The project or task worktree opens in the remote context
Prerequisites
- SSH access configured between your local machine and remote server
- SSH keys or credentials set up (no password prompts)
- VSCode Remote-SSH extension installed (or equivalent for Cursor/Windsurf)
- The remote server path must be accessible via SSH
Git
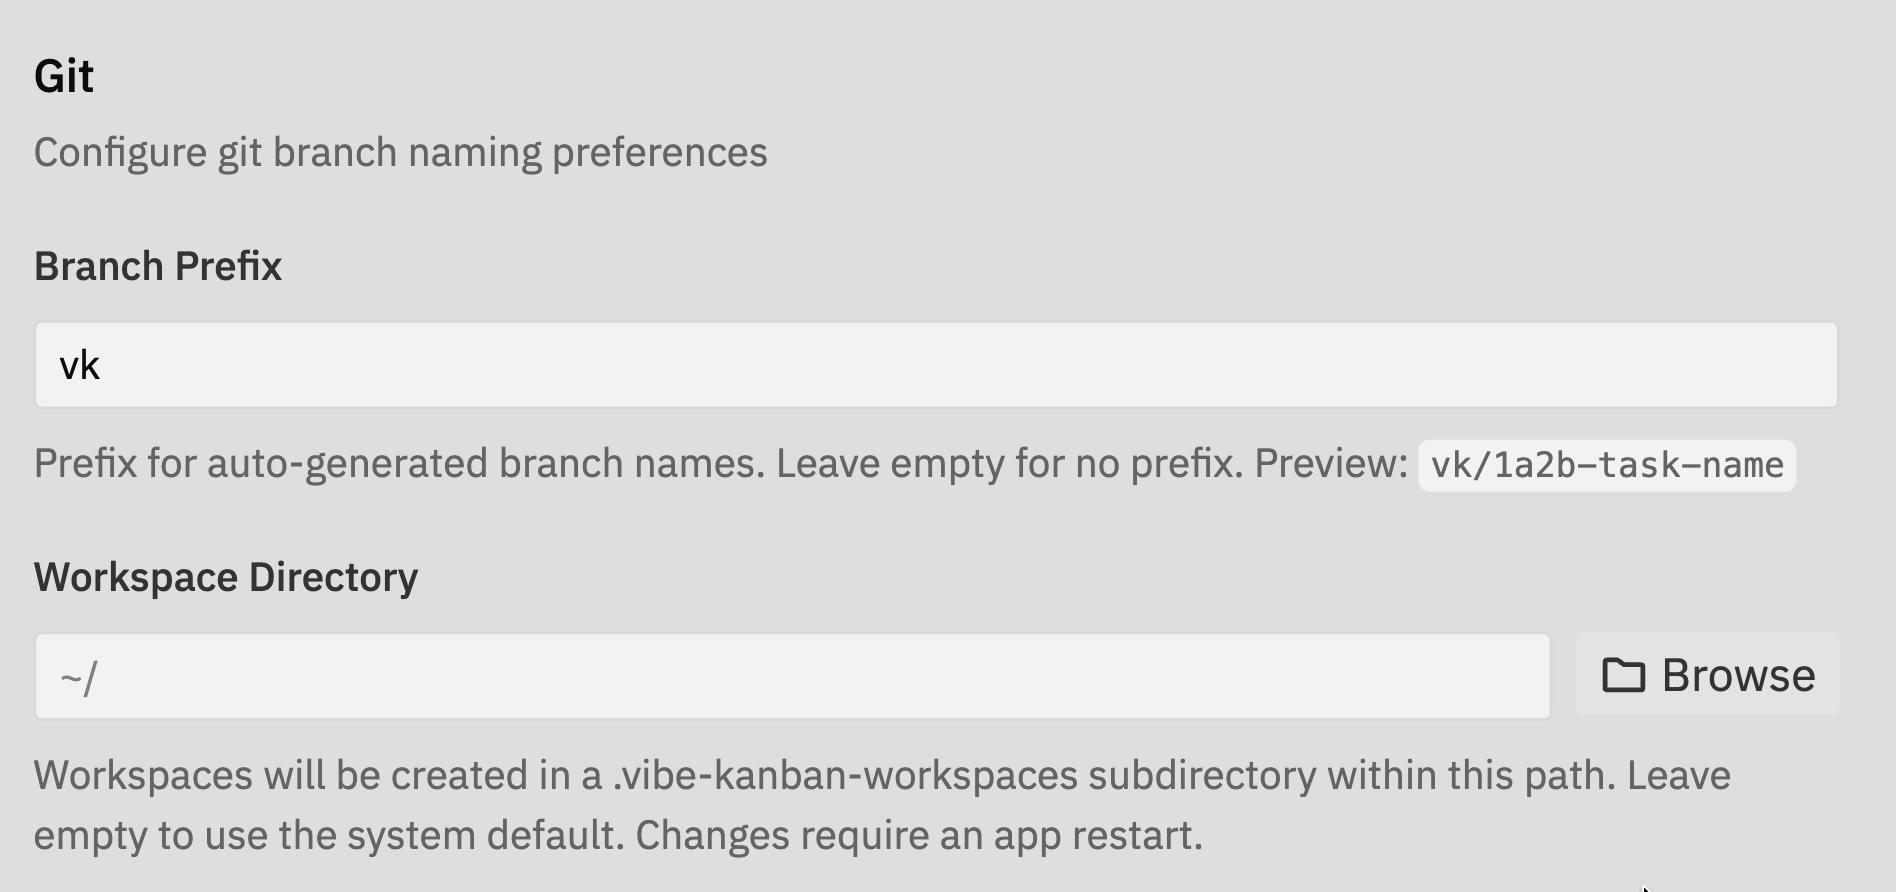
Branch Prefix
Set a prefix for auto-generated branch names. When you create a new workspace or task, Vibe Kanban automatically creates a git branch for your changes.| Prefix Setting | Example Branch Name |
|---|---|
vk | vk/1a2b-implement-auth |
feature | feature/1a2b-implement-auth |
| (empty) | 1a2b-implement-auth |
Workspace Directory
Specify where Vibe Kanban stores workspace data. Workspaces are created in a.vibe-kanban-workspaces subdirectory within this path.
- Default location - Leave empty to use the system default (typically your home directory)
- Custom location - Set a specific path if you prefer workspaces on a different drive or directory
Notifications
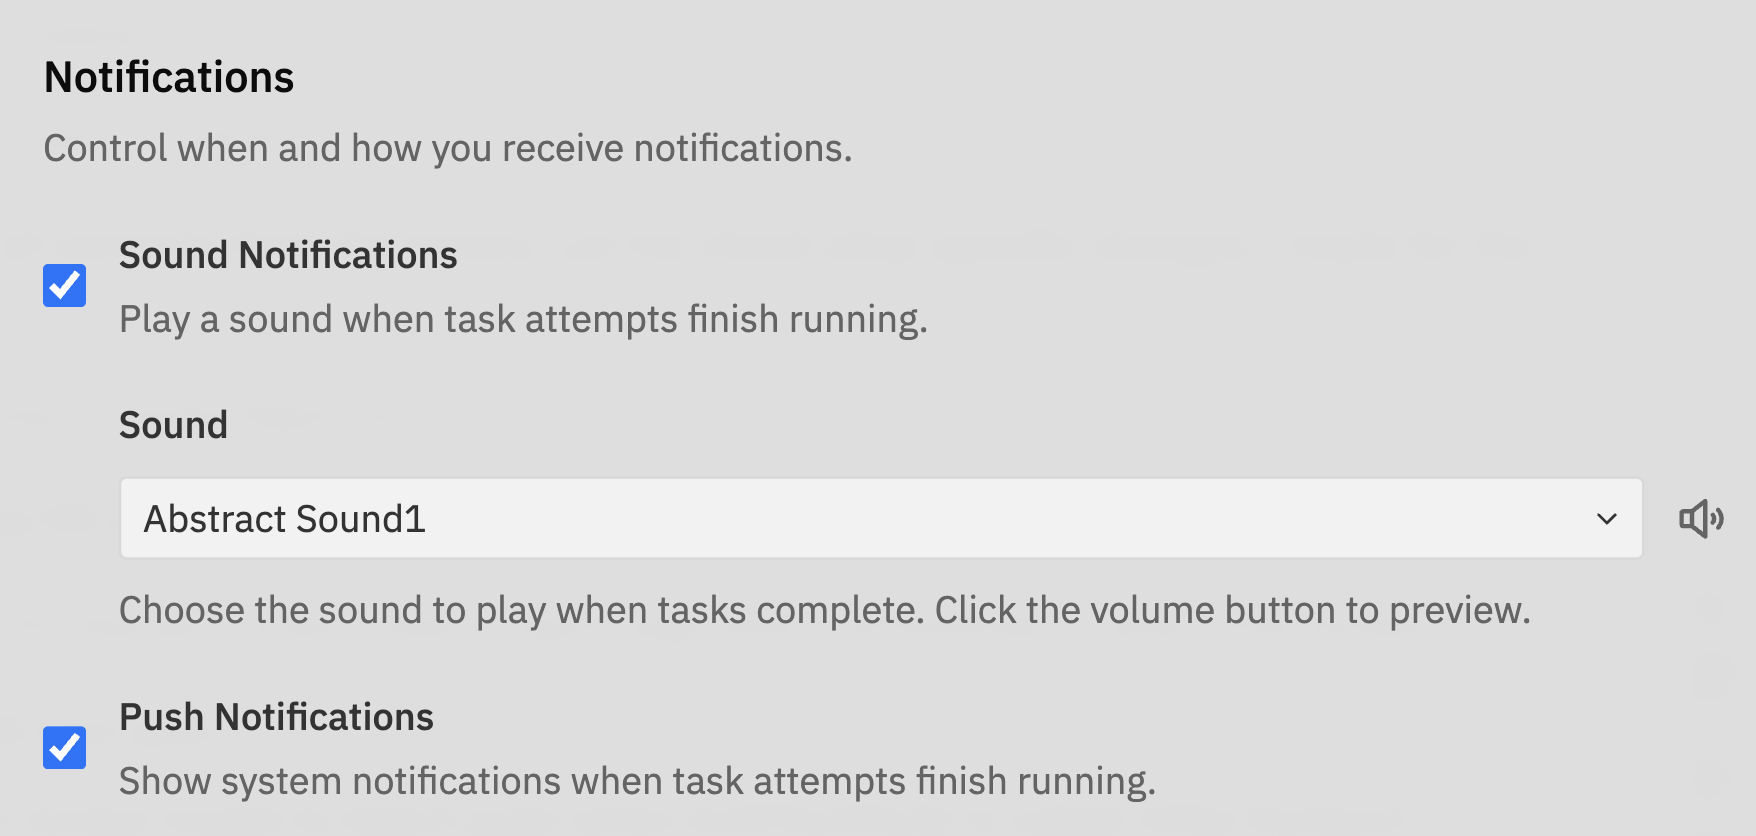
- Sound Effects - Play audio notifications when tasks complete, need attention, or encounter errors. Useful when working with multiple tasks or when Vibe Kanban runs in a background tab.
- Push Notifications - Receive browser notifications even when Vibe Kanban isn’t in focus. Requires browser permission when first enabled.
Telemetry
Enable or disable telemetry data collection to help improve Vibe Kanban.Message Input
Choose the keyboard shortcut to send messages in the chat input (Enter or ⌘/Ctrl + Enter).
Tags
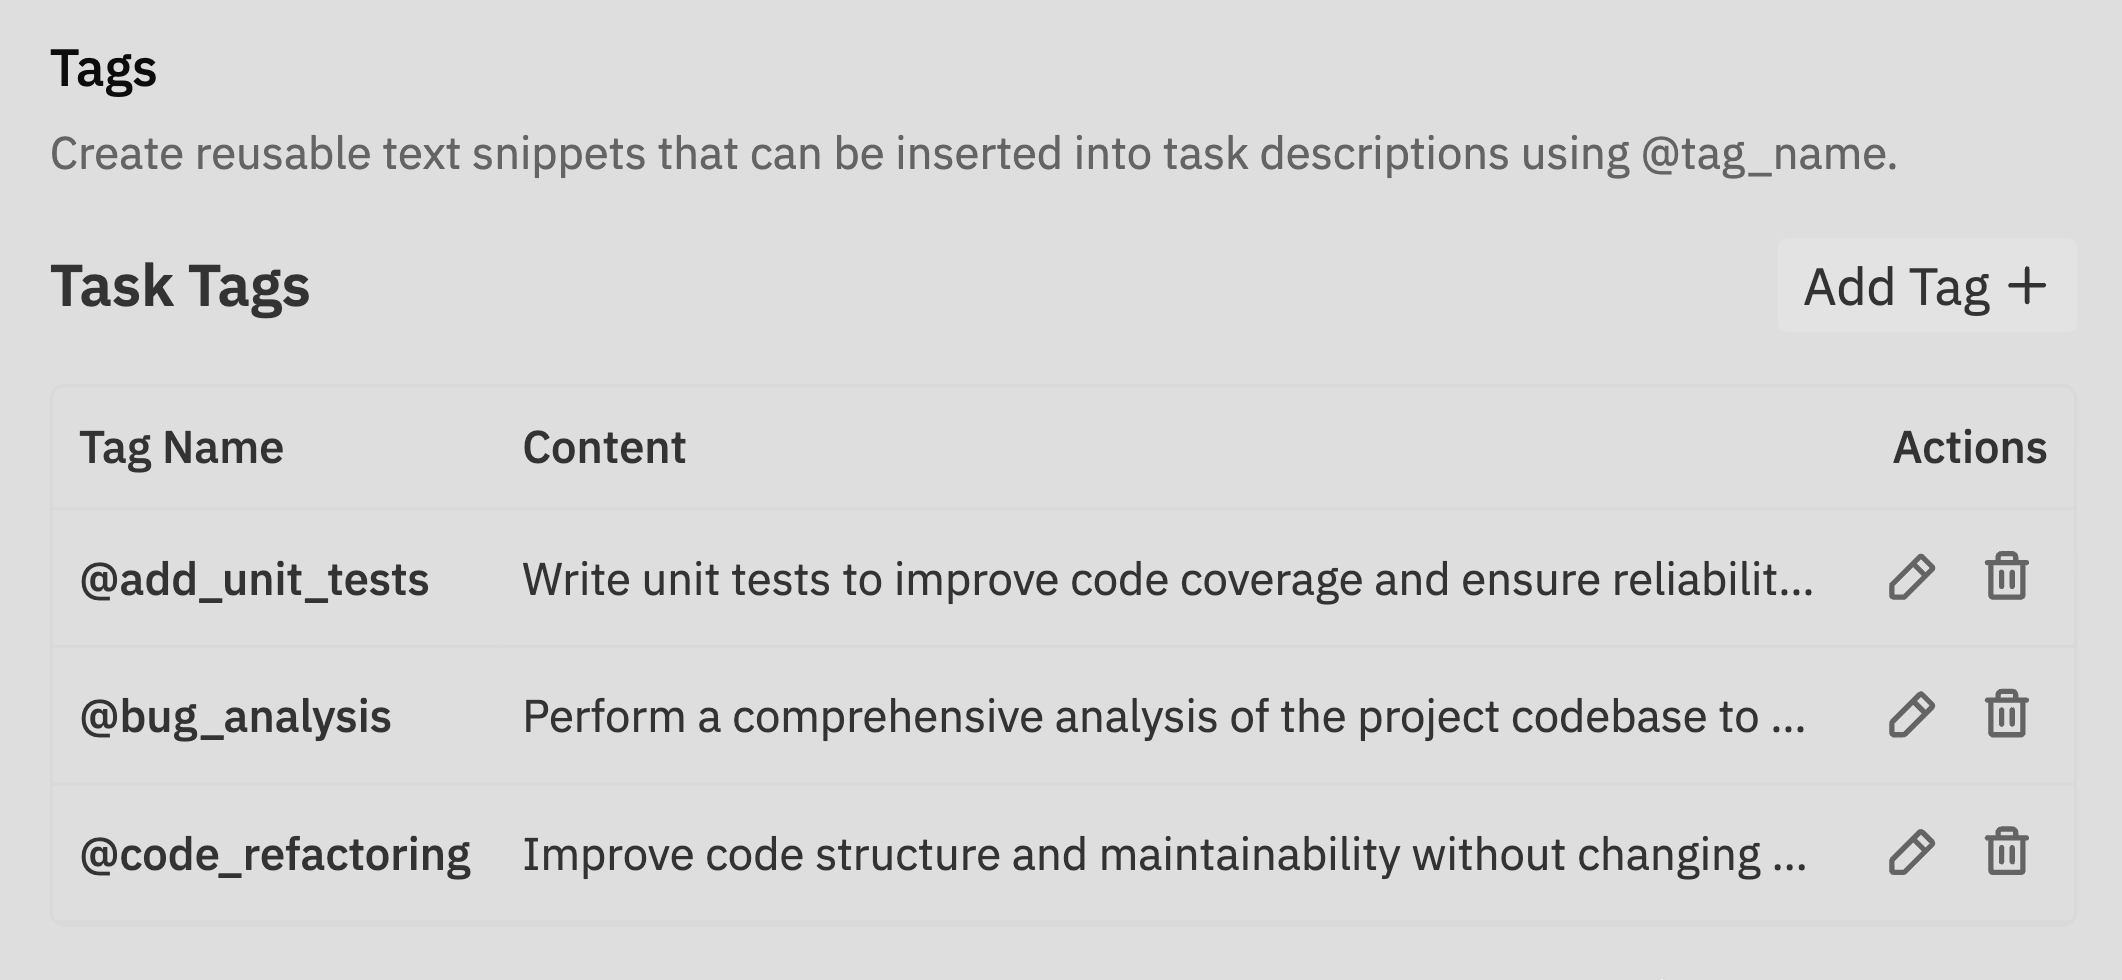
@tag_name.
- Add Tag + - Create a new tag
- Tag Name - The @mention name for the tag
- Content - The text that will be inserted
- Actions - Edit or delete existing tags
Learn more about tags
Complete guide to creating and managing tags
Beta Features
Enable or disable beta features to try new functionality before general release.Workspaces Beta
The new Workspaces UI is a complete redesign of the task execution experience with multi-repository support, multiple agent sessions, and an integrated preview browser. When enabled, you can access it by clicking on any task attempt. To enable or disable Workspaces:- Find the Beta Features section
- Toggle Enable Workspaces Beta
Workspaces Documentation
Complete guide to using the new Workspaces UI